Thursday, May 30, 2013

Caste System in The Honey Bee Colony: The Queen

The Honey bee colony is composed of three different castes of bees. The Queen bee, the workers bees and the drones (males). They all have a purpose they serve and if one of them is not present the colony cannot function properly. Above the other caste of bees, the queen in the most important.
Our Rooftop Queen (circled in red)
            The queen bee’s life starts off the same way a worker bee does. However, there are small significant differences that the queen bee has that worker bees do not. For instance, the queen bee is but into a different cell that looks similar to a peanut this helps her grow bigger and is not limited to the size of the average worker cell. Also, unlike the worker bees the queen bee is fed royal jelly throughout her life time. The Queen will live an average of three to five years when the average worker bee will live approximately 30 day.
Queen cell
            The queen is the only bee in the colony that is able to reproduce. Interestingly, she only mates once in her lifetime with multiple drones, male bees. She is able to store all the “genetic make-up” that she has attained. In addition, she can also choose what “genetic make-up” from a specific male she would like to use next. The rest of her life is mainly devoted to laying eggs. She is capable of laying 2000 eggs in one day.
            Although the queen is very important she can be replaced under certain circumstances. For instance, if the queen recently dies the worker bees will create a queen cell that looks like an outline of a peanut or a tear drop. Then they would take the youngest larvae and put it in the queen cell. Like every queen this larvae will be fed extensive amounts of royal jelly.
            The worker bees will raise a queen under different circumstances. In this case, the queen in not dead but rather the colony believes the queen is getting too old. As the queen gets older her pheromone output diminishes. Thus deeming the queen less useful to the colony and the colony eventually decides to replace her. The worker bees will do the same process as if the queen died. The only difference is that once that replacement queen has been born the colony proceeds in killing the older queen by clustering around her until she dies of overheating. The bees also use this for defense purposes in case a swaps or an unknown bee decides to disturbs the colony.
            On the other hand, a new queen does not always mean bad news. The queen herself can lay a new queen or in this case an heir. This only happens when the queen feels that she has accomplished her duty to one hive and leaves to create another. Before she begins her journey she first lays multiple eggs in queen cells. Once the new queens are capped and before they emerge the old queen and 60% of the worker bees leave the original location. This is called swarming.

            The queen is unique to most colonies since most colonies only have one queen. She provides continues life to her colony. However, she can be replaced if the colony or the queen chooses to.
Stay tuned in for later blog post concerning the other caste of bees in the colony. Next up is the worker bees and their multiple roles throughout their 30 day lifetime.


Written by Dulay

Tuesday, May 21, 2013

Quick and Healthy Breakfast Ideas


Last week, Judy Andino joined CORE/El Centro to offer a Healthy Cooking Class focused on quick and easy protein-packed breakfasts. The attendees learned that having a healthy serving of vegetables doesn't taste all that bad, especially in a smoothie! 

The mix of ingredients we started out with.
There are many other ingredients to use in a smoothie other than fruit. The most interesting vegetable used was kale, but some other unusual ingredients were chia seeds and flaxseed. Kale, chia seeds, and flaxseed are sold at most major grocery stores. Kale is found in the vegetable aisle, and chia seeds and flaxseed can be found in either the natural aisle, supplement aisle, or baking aisle, depending on what store you're in.


The smoothies we learned about are fast and extremely easy to make. The class favorite was a twist on a tropical fruit smoothie:
-1 1/2 carrot
-1/2 banana
-A handful of greens (spinach, kale, etc.)
-A handful of tropical fruit (which is best if bought frozen)
-A tablespoon of chia seeds or flaxseed
-Water of fruit juice
You can play around with smoothies and make them how you prefer them.

Everybody was attentive and eager to learn about the art of smoothie making.

Quotes from class participants:

"I didn't know you can add kale, spinach, different seeds (chia, flax), and spices and fruits together and have great meals!"

"Was nice to share in a group and especially the motivation for healthy living."

"I learned that we can replace some of the protein from meat with vegetables and seeds."

"Being able to experience the tastes will help me to continue using the recipes I learned today." Written by Chloe

Monday, May 20, 2013

NEW! Rooftop Farmer's Market

Come check out our gorgeous rooftop space at CORE/El Centro! Our first day will be Saturday, June 1st from 11 AM to 1:30 PM. We will be operating rain or shine every Saturday at the same time through September 17th. If rain, the market will be held on the first floor in the lobby. Core/El Centro is located on 130 W. Bruce Street.


Vendors

We will have a variety of different vendors to make our farmer's market very interesting for everyone. Some of these products these vendors would sell include cheese, fresh fruits and vegetables, eggs, tortillas and other bakery items, coffee, fish, and rotating vendors selling jam and honey. We will alos have a few different prepared food options such as fresh, delicious salads. 


Photo taken at Walker's Square Farmers Market 2012

Photo taken at Walker's Square Farmers Market 2012


Why shop at a local farmer's market?

There are many benefits to shopping at a farmer's market. For one, the products are fresher and this helps add more flavor. Shopping at your local farmer's market can even decrease your carbon footprint. It only takes the farmer one truck to deliver their products to the market instead of the many trucks it would take to deliver these same products to a grocery store.You know where the produce is coming from as well. You get an opportunity to talk to the farmer who is selling the product. Buying things from these farmers means that you are helping support their farm. Most of these farms are small, family operated farms. When you shop at a grocery store, only 16 cents of each dollar you spend on food  actually goes to the farmer. Shopping at the farmer's market ensures that the money is going directly to the farmer.

We hope to see you on opening day!  Click Here for the Flyer


Written by Samantha

Tuesday, May 7, 2013

Community composting at Edible Skyline

In partnership with the Kompost Kids, a non-profit organization in Milwaukee, CORE/el Centro will offer signage and education on it's rooftop.
Last weekend a second compost bin was installed by volunteers, utilizing chicken wire, burlap bags and recycled pallets. The ingenuity of this design is that the bin door isn't attached directly to the sides of the bin, but is held on by pvc piping which is connected by metal anchors. See below for step by step photos of the process.
It is usually a good idea to build at least two compost bins so you can have one 'active' pile that you are adding to and another 'resting' pile that is breaking down (it will break down faster of you can turn out regularly.) Composting doesn't need to be done in a container, but having one helps the image and can deter critters from rummaging through your pile looking for dinner.
Here are the steps we took to build our community compost bins.

Step 1: Gather Materials


We were fortunate to receive burlap bags and pallets from donors. It helps to have large scale coffee roasters in town. You will also want chicken wire to line the bin, screws to hold it together and pvc pipe for the doors. You can also use up old paint by decorating the outside of the bin. We are planning to decorate ours more, we just ran out of time this day.


Step 2: Construct Frame


Because we already had one bin built we used the side of that bin to build our second bin. Using screws and an electric drill, fasten the sides together. Because we are on a rooftop with a gravel surface, we put down a tarp to be able to easily collect the finished compost. If you are building on your backyard you can put your compost right on the grass. It will become the most fertile place on your yard after a few years!


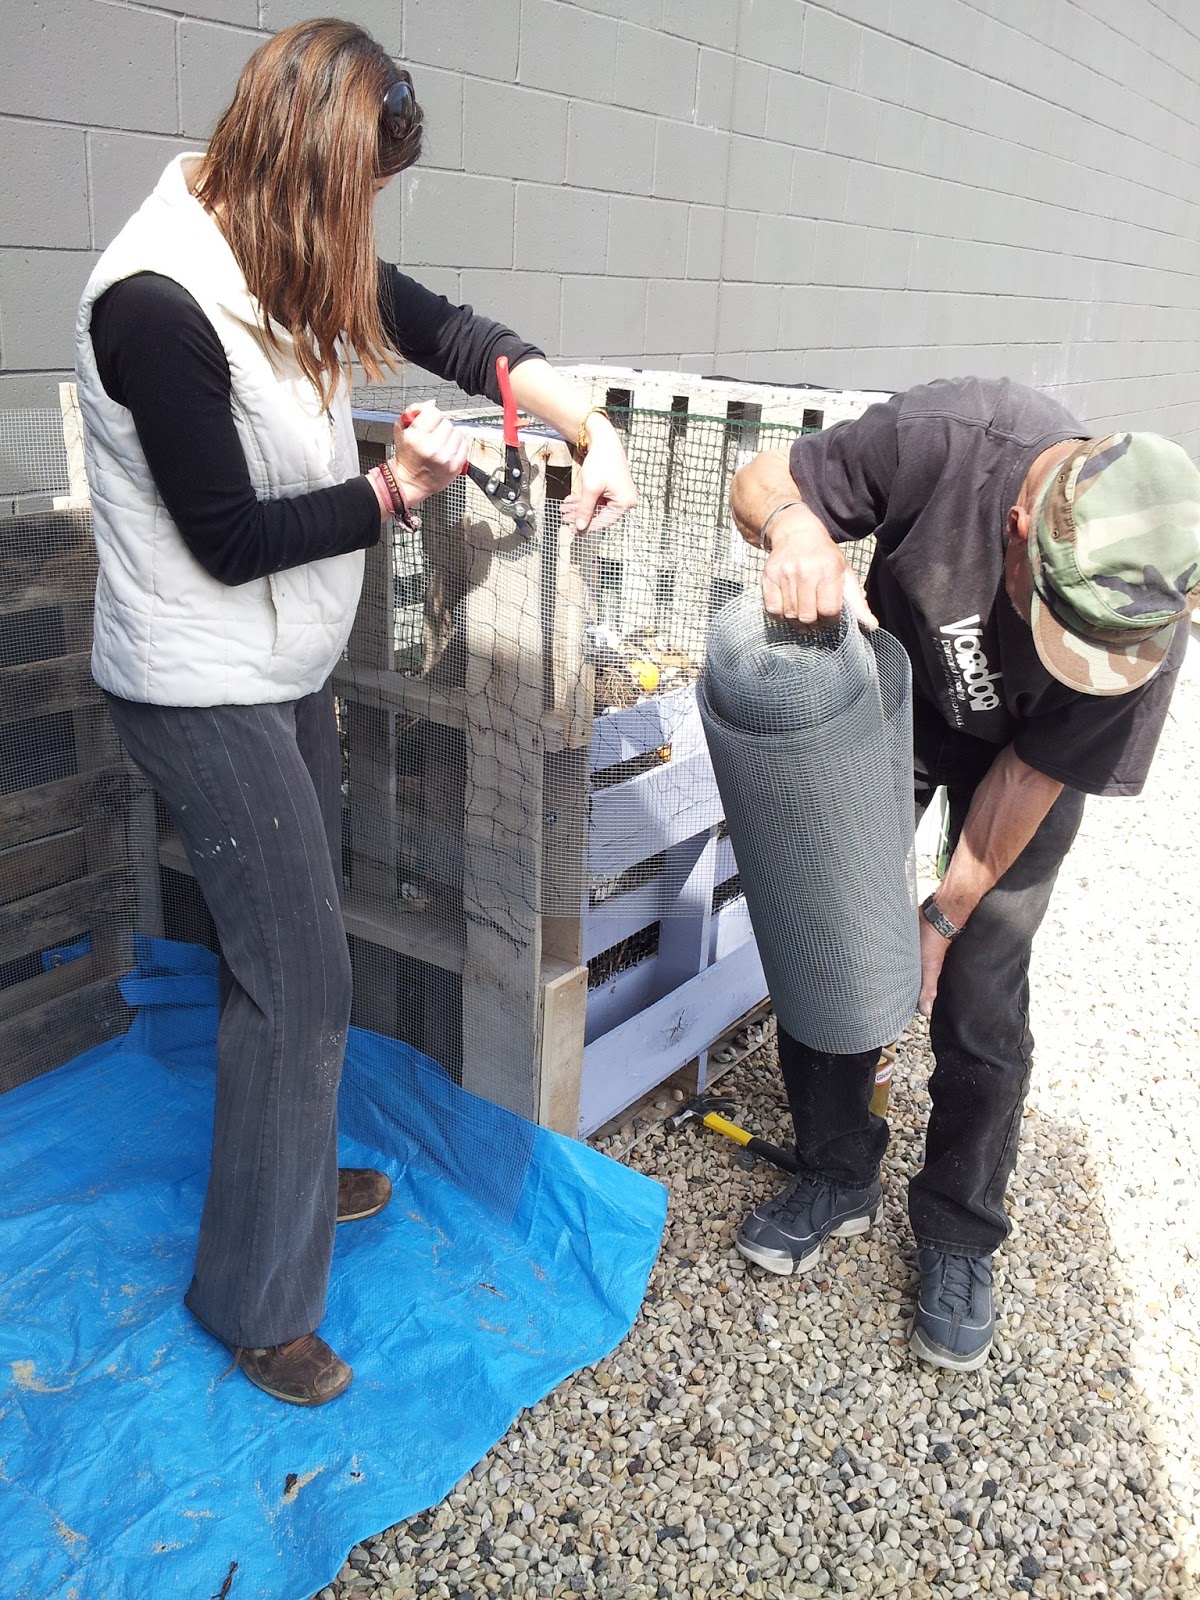
Step 3: Line the Inside of the Bin


 We used a layer of chicken wire covered by burlap bags. The burlap will degrade over time, so in a few years we will need to replace the bags. You can also use landscape fabric instead off this double later process, but we were interested in spending the least amount of money!

Step 4: Attach the Door

Before attaching, line the door with the chicken wire and burlap and paint if you'd like.


Attach Pipe Straps to the sides of the frame, using the pipe as a measurement, to make sure they line up.  Once attached at top and bottom, place the fourth pallet (door) in the frame to measure where to connect the pipe strap to the door.


The pvc pipe will then hold the door in place.  When it is time to turn the compost, simply remove the pvc pipe and take off the then-freestanding pallet door.

Thursday, May 2, 2013

Fruit Tree Orchard in Walker's Point

As you may recall, in a previous blog post I shared the video that CORE/El Centro and Bucketworks put together which won a fruit and nut tree orchard for our neighborhood.

Last Saturday a number of volunteers came out to help plant 23 of the 26 trees for our neighborhood (a few trees are delayed in arriving).


Here are some photos - there was a second 'wave' of volunteers from Victory Garden Initiative who had their own photographer, so I don't have photos here of that group, but will post a link to their photos once it's up.
Our 23 trees, bushes, and vines ready to be put in the ground!

A Bartlett Pear Tree on it's way to Anodyne Coffee Roasters


Danielle and Sam ready to take their apples, hazelnut and berries
to Independence First and Comedy Sportz.

An Elderberry going into the ground

Our youngest volunteer hard at work! 


Sam and Danielle watering the last of their trees

A blackberry bush goes in next to raspberries at CORE/El Centro,
atop the Clock Shadow Building

The Pear tree going in next to the future home of Anodyne Coffee Roasters

Thanks to Kathy and Ann - volunteering as part of
Marquette Administrators Service Day

Two Apple trees tucked into their new home at Independence First